
Hurricane season is a critical period for Puerto Rico, and being prepared can make the difference between safety and danger. In
He maintenance of an electric generator is essential to ensure its correct operation and prolong its useful life. An important part of this maintenance is the assembly and disassembly of the generator. In this complete guide, we will learn the key steps and tips to properly assemble and disassemble an electric generator. If you own an electric generator or are interested in learning more about its maintenance, you have come to the right place!
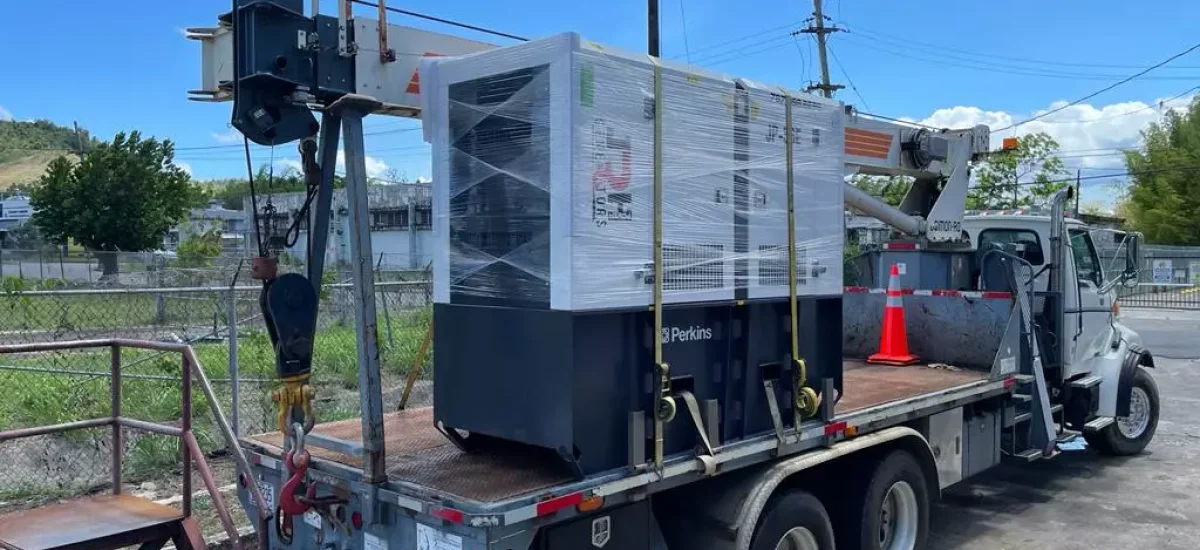
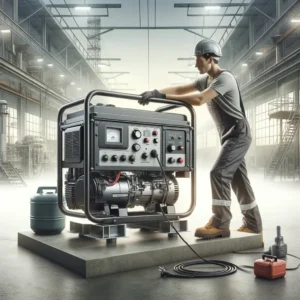
Before assembling or disassembling an electric generator, it is important to know the different parts that make it up. This will help you understand how to properly assemble and disassemble equipment. Some of the main parts of an electric generator are:
Engine: It is the part of the generator that drives the movement of the alternator to generate electricity. It can be gasoline, diesel, gas or other types of fuel.
Alternator: It is the component that converts the mechanical energy of the motor into electrical energy. It is made up of a rotor and a stator, and generates alternating current that is used to power electrical devices.
Fuel system: It includes the fuel tank, the fuel lines and the injection system or carburetor, depending on the type of engine. It is responsible for supplying the fuel necessary for the operation of the generator.
Exhaust system: It is made up of the exhaust pipe and the silencer, and is responsible for expelling the exhaust gases produced during the combustion of fuel.
Control system: It is the control panel of the generator, which includes switches, meters, fuses and other devices to control the operation and protection of the generator.
Before beginning with the assembly and disassembly of an electric generator, it is important to ensure that you follow the proper safety measures. Be sure to read and understand the manufacturer's manual and follow the recommended precautions. Once you have taken the necessary security measures, you can follow the following steps to assemble and disassemble your electric generator:
Before you begin assembling your electric generator, make sure you have a clean, well-lit space to work in. Make sure you have the necessary tools and have on hand the parts and components you will need for assembly.
Begin by assembling the chassis of the electric generator according to the manufacturer's instructions. Be sure to follow the assembly steps in the correct order and to properly tighten the screws and fasteners.
Once you've assembled the chassis, it's time to connect the generator's electrical components. This includes installation of the engine, alternator, voltage regulator, and other necessary electrical components. Follow the manufacturer's instructions and make sure you connect the wires correctly and tighten the fasteners properly.
The exhaust system is an important part of the electric generator as it helps reduce noise and directs exhaust gases away from the work area. Follow the manufacturer's instructions to properly install the exhaust system, making sure to use the proper gaskets and fasteners.
Once you have assembled all the components of the electric generator, it is important to verify all the connections and adjustments. Make sure that all connections are tight and that the settings are according to the manufacturer's specifications.
The disassembly of an electric generator must be carried out carefully and following the manufacturer's instructions. Here are the important steps to follow:
Shutdown and disconnection: Before beginning disassembly, be sure to turn off the electrical generator and disconnect it from any power source. This includes turning off the engine and disconnecting electrical cables.
Exhaust System Removal: Begin by removing the exhaust system from the electric generator, following the manufacturer's instructions. This may include removal of gaskets, fasteners, and exhaust system components.
Disconnection of electrical components: Next, disconnect the generator's electrical components, such as the engine, alternator, and other components, following the manufacturer's directions. Be sure to disconnect the wires correctly and label them for easy identification in the future.
Disassembly of the chassis: Disassemble the chassis of the electric generator, following the manufacturer's disassembly steps. Be sure to remove all necessary screws, fasteners, and components in a careful and organized manner.
Inspection and cleaning: Once you have disassembled the electric generator, it is important to perform a detailed inspection of all parts and components. Check to see if there are any damaged or worn parts that need to be replaced. Clean all parts and components before storing or performing any repairs.
Here are some additional tips that you should keep in mind when assembling and disassembling an electric generator:
Always follow the manufacturer's instructions
The manufacturer's manual is your best guide for the assembly and disassembly of the electric generator. Be sure to follow all the manufacturer's detailed instructions and recommendations to avoid mistakes and ensure proper assembly and disassembly.
Maintain a clean and organized work area
A clean and organized space will allow you to work more efficiently and safely. Make sure you have all the necessary tools and parts on hand, and keep your work area free of obstructions and clutter.
Label and document cables and components
Be sure to label and document all wires and components that you disconnect during disassembly of the electric generator. This will make it easier for you to reconnect them correctly during assembly.
Use proper tools
Use the right tools for each task during the assembly and disassembly of the electric generator. Make sure you have the correct and working tools, and use proper techniques to avoid damaging generator parts or components.
Take safety precautions
Before you begin assembling or disassembling the generator, be sure to follow all safety precautions, such as turning off the generator, disconnecting it from the power source, and wearing proper personal protective equipment.
Perform functional tests
After assembling the generator, run test runs to make sure it is operating correctly before putting it to use.
The assembly and disassembly of an electric generator is a process that requires care and attention to the manufacturer's instructions. By following the proper steps, using the proper tools, and taking safety precautions, successful assembly and disassembly can be accomplished.
Remembering to label and document cables and components, maintaining a clean and organized work area, and always following the manufacturer's directions are important tips to keep in mind.
It is always advisable to consult the manufacturer's manual and, in case of doubts or difficulties, seek the help of a qualified professional. With proper disassembly and assembly, an electric generator can be maintained and repaired efficiently and ensure its optimal operation.
No matter if it is for your home, your business or your outdoor activities, our generators They will give you the energy you need anytime, anywhere. Ensure your peace of mind and comfort! ¡Contact Us today and discover how our electric generators can make your life easier and worry-free!

Hurricane season is a critical period for Puerto Rico, and being prepared can make the difference between safety and danger. In

Understanding how a hurricane forms allows us to be one step ahead and prevent the devastating effects of these natural phenomena. Especially in areas
In a world where energy efficiency is increasingly a priority, learning to save energy has become a crucial need for both
In a world that doesn't stop, the need for a reliable and continuous power source is more crucial than ever. At JRH Power
Have you ever wondered how electricity becomes a constant in our lives, even in the most critical moments? At JRH Power
In our modern world, where electricity is vital, power outages are a frequent reality. Know how to connect a generator to the house